Best Thermal Paste for Nintendo Switch: Top Picks Reviewed!


Are you a Nintendo Switch enthusiast looking to take your gaming experience to the next level? Well, hold on tight because I’m about to unveil the secret ingredient that can supercharge your beloved console: thermal pastes!
Finding the best thermal paste for your Nintendo Switch can be a daunting task, especially if you’re new to the world of console tinkering. But worry not, because I’ve got you covered. In this article, I’ll guide you through the top-notch thermal pastes that can help keep your Switch running cool and optimize its performance.
Whether you’re an intense gamer, a casual player, or someone who loves the versatility of the Switch, we’ll explore the perfect thermal paste options to suit your specific needs. So, let’s dive right in and unleash the full potential of your Nintendo Switch gaming experience together!
Overview of the Best Nintendo Switch Thermal Pastes
Comparison Table
| Thermal Paste | ARCTIC MX-4 | Corsair TM30 | Thermal Grizzly Kryonaut |
|---|---|---|---|
| Thermal Conductivity (W/m·K) | 8.5 | Not specified | 12.5 |
| Ease of Application | Easy | Easy | Easy |
| Longevity | High stability and long service life | High stability and long service life | Long-lasting effectiveness at high temperatures |
| Immediate Temperature Reduction | Yes | No | Yes |
| Price (approximate) | $6 – $10 (4g) | $5 – $15 (4g) | $10 – $15 (5.55g) |
| Awards | Best Overall | Long-Lasting | Most High-Performance |
Ranking List
1. ARCTIC MX-4 – Best Overall
The ARCTIC MX-4 takes the top spot due to its excellent balance of thermal performance, ease of application, and affordability. It has received the Tom’s Hardware Editor’s Choice Award for its outstanding qualities.
2. Corsair TM30 – Best Long-Lasting
The Corsair TM30 earns the award for being long-lasting and highly stable, ensuring consistent thermal performance over time. Its high-stability liquid compound and durability make it a reliable choice.
3. Thermal Grizzly Kryonaut – Most High-Performance
The Thermal Grizzly Kryonaut stands out with its exceptional thermal conductivity, making it perfect for demanding configurations. It has been recognized as the preferred option by overclockers and enthusiasts.
Reviewing the Best Thermal Pastes for Nintendo Switch
1. ARCTIC MX-4 – Best Overall
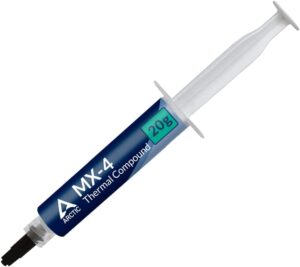

I recently got my hands on the ARCTIC MX-4 thermal paste, and let me tell you, it’s a game-changer for my old Nintendo Switch! The first thing that caught my attention is the well-proven quality of this thermal paste. Despite its packaging undergoing changes, the formula has remained the same, ensuring consistent high quality.
One of the standout features of the ARCTIC MX-4 is its excellent performance. Made with carbon microparticles, it boasts exceptional thermal conductivity. This means that heat generated by the CPU and GPU is efficiently dissipated, resulting in lower temperatures and improved overall performance.
Safety is always a concern when it comes to applying thermal paste, but the MX-4 has got you covered. Being metal-free and non-electrical conductive, it eliminates any risk of short circuits, providing added protection to your valuable CPU and VGA cards.
Another aspect that impressed me is the authenticity check provided by ARCTIC. This feature allows you to verify the originality of the product, giving you peace of mind that you’re using a genuine and reliable thermal paste.
One of the things I appreciated most about the MX-4 is how easy it is to apply. With its ideal consistency, even beginners can confidently use it. The inclusion of a spatula further simplifies the application process.
To sum up, the ARCTIC MX-4 is hands down the best overall thermal paste for the Nintendo Switch. Its proven quality, exceptional performance, and easy application make it a must-have for anyone looking to keep their console running cool and optimized. Trust me, your Nintendo Switch will thank you for it!
What I Liked
- Well-proven quality
- Excellent thermal conductivity
- Safe application, metal-free, and non-electrical conductive
- Authenticity check for genuine product
What I Disliked
- Requires careful application to avoid excessive use
2. Corsair TM30 – Best Long-Lasting
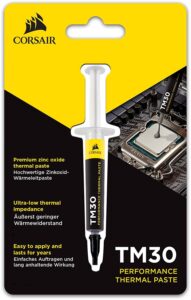

I recently tried out this thermal paste from Corsair TM30 for my old Nintendo Switch, and I must say, it has exceeded my expectations. As an enthusiast CPU thermal compound, it offers premium zinc oxide-based performance, making it an excellent choice for optimal thermal management.
One of the standout features of this thermal paste is its ability to effectively cool both the CPU and GPU. By either installing it on a new system or replacing the existing compound, I noticed a significant improvement in heat transfer, resulting in lower temperatures overall. This is particularly crucial for Nintendo Switch owners, as it helps prevent overheating and potential performance issues during intense gaming sessions.
Furthermore, the ultra-low thermal impedance of this thermal paste sets it apart from common alternatives. It effectively lowers CPU temperatures, ensuring that the system runs efficiently and smoothly. The installation process is made hassle-free with the inclusion of an application stencil and spreader, eliminating any guesswork and ensuring a precise application on the CPU cooler.
Another notable benefit of this thermal paste is its ability to fill microscopic abrasions and channels, thanks to its low-viscosity formula. This feature promotes peak thermal transfer and enhances overall performance. Also, it boasts a long service life with no drying, cracking, or change in consistency over the years, guaranteeing reliable and consistent performance.
When it comes to safety, this thermal paste is a winner. It is non-conductive and contains zero volatile compounds, ensuring the protection of both you and your precious Nintendo Switch.
What I Liked
- Premium zinc oxide-based thermal compound
- Effective cooling for CPU and GPU
- Ultra-low thermal impedance
- Easy installation with included stencil and spreader
What I Disliked
- Not the most affordable option
- Requires careful application for optimal results
If you also have an old Xbox, see our guide on the best thermal pastes for Xbox 360 to speed up your Xbox too.
3. Thermal Grizzly Kryonaut – Most High-Performance
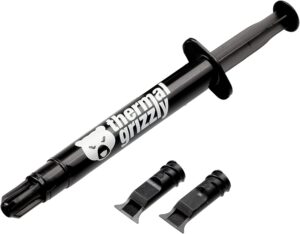

Last but not least, the Thermal Grizzly Kryonaut thermal paste lives up to its reputation as one of the most high-performance options out there. With a thermal conductivity of 12.5W/(m·K), it’s perfect for demanding configurations, making it an excellent choice for gamers and enthusiasts alike.
One of the standout features of this thermal paste is its ease of use. It comes with a specially constructed spatula for spreading the thermal grease, ensuring a precise and hassle-free application. This is particularly convenient for those who may not have much experience with applying thermal paste.
In terms of longevity, the Kryonaut thermal paste is impressive. Its unique structure allows it to remain effective even at temperatures up to 80 degrees Celsius without drying out. This means that you can rely on its performance over an extended period, ensuring consistent heat management for your system.
I was particularly impressed by the immediate results I experienced when using this thermal solution. It effectively lowered temperatures, resulting in reduced equipment noise and improved user comfort. This is a significant advantage, especially for individuals who prioritize a quieter and more comfortable gaming experience.
The Thermal Grizzly Kryonaut has been confirmed by multiple tests as a top-performing thermal paste. It satisfies the highest quality criteria for both standard computer users and enthusiastic overclocking fans. Regardless of your usage scenario, you can trust in its performance and reliability.
With a weight of 5.55 grams, this thermal paste provides ample quantity for multiple applications. It can be used for up to 33 CPUs, depending on the size of the DIY projects you undertake.
What I Liked
- Very high thermal conductivity
- Easy to use with included spatula
- Long-lasting effectiveness even at high temperatures
- Immediate temperature reduction for improved comfort
What I Disliked
- Relatively higher price point
- Requires careful application for optimal results
How to Apply a Thermal Paste to Nintendo Switch
Step 1: Prepare the Nintendo Switch


Preparing the Nintendo Switch for thermal paste application is an essential step to ensure a safe and effective process. Here are the detailed steps in a numbered list:
- Turn off the Nintendo Switch: Begin by powering off the Nintendo Switch completely to prevent any potential damage during the process.
- Unplug the Power Source: Disconnect the Nintendo Switch from any power sources, including the charger or dock. This step is crucial for your safety and to avoid any electrical mishaps.
- Gather the Tools: Prepare the necessary tools, including a small screwdriver or a prying tool, which will be used to remove the back cover of the Nintendo Switch. Ensure that the tools are suitable for the specific screws or clips on your device.
- Remove the Back Cover: Carefully locate and remove the screws or clips that secure the back cover of the Nintendo Switch. Use the small screwdriver or prying tool to gently pry open the cover, being cautious not to exert too much force and potentially damage any internal components.
- Handle with Care: Throughout the process of removing the back cover, exercise caution to avoid any undue stress on the delicate components inside the Nintendo Switch. Take your time and be gentle when removing the cover to prevent any accidental damage.
Step 2: Clean the CPU and Heat Sink


Cleaning the CPU and heat sink before applying thermal paste is a critical step to ensure proper heat transfer and optimal performance. Here are the detailed steps in a numbered list:
- Gather Cleaning Materials: Prepare lint-free cloth or alcohol wipes that are suitable for cleaning electronic components. These materials will help remove the existing thermal paste and any debris from the surfaces.
- Clean the CPU: Gently wipe the surface of the CPU using the lint-free cloth or alcohol wipe. Ensure that you remove any remnants of the previous thermal paste thoroughly. Be cautious not to apply excessive pressure or damage the CPU.
- Clean the Heat Sink: Similarly, clean the surface of the heat sink using the same lint-free cloth or alcohol wipe. Remove any existing thermal paste residue, dust, or debris. Pay attention to the fins and other crevices on the heat sink to ensure thorough cleaning.
- Verify Cleanliness: After cleaning, visually inspect both the CPU and heat sink surfaces to ensure they are free from any residue, dust, or debris. Any leftover material can hinder the effectiveness of the new thermal paste.
- Allow Drying Time: If using alcohol wipes for cleaning, allow the CPU and heat sink surfaces to dry completely before proceeding to the next step. This ensures that there is no moisture left, which can affect the application of the new thermal paste.
Step 3: Apply the Thermal Paste
Applying thermal paste properly is crucial for achieving optimal heat transfer between the CPU and the heat sink. Here are the detailed steps in a numbered list:
- Get the Thermal Paste: Ensure you have the thermal paste ready for application. It is recommended to use a small amount, approximately the size of a grain of rice or a small pea, depending on the specific instructions provided by the thermal paste manufacturer.
- Apply the Thermal Paste: Take the predetermined amount of thermal paste and place it onto the center of the CPU. Be careful not to apply too much as excess paste can lead to excessive spreading and potential performance issues.
- Position the Heat Sink: Gently place the heat sink back onto the CPU, aligning it correctly with the mounting holes or clips. Take your time to position it accurately to ensure proper contact with the thermal paste.
- Spread the Thermal Paste: Apply gentle and even pressure to the heat sink, allowing the thermal paste to spread naturally between the CPU and the heat sink. The pressure applied should be sufficient to achieve a thin and uniform layer of paste across the entire CPU surface.
- Secure the Heat Sink: Once the thermal paste is spread evenly, secure the heat sink back in place using the screws or clips provided. Make sure to fasten them tightly, ensuring a secure and stable connection between the CPU and the heat sink.
If you also have an old PlayStation, see our guide on the best thermal pastes for PS3 to speed up your PlayStation too.
Frequently Asked Questions
I recommend replacing the thermal paste on your Nintendo Switch every 1-2 years or if you notice increased temperatures. That said, thermal paste replacement frequency usually depends on usage and temperature.
Yes, you can use any thermal paste that is safe for electronic components. But it’s advisable to choose a high-quality thermal paste specifically designed for CPUs and GPUs to ensure optimal performance and longevity.
A small amount, approximately the size of a grain of rice or a small pea, is sufficient for the Nintendo Switch CPU. Applying too much thermal paste can cause issues, so it’s important to avoid excessive spreading and ensure a thin and even layer for efficient heat transfer.
![Best Non-Conductive Thermal Paste [Tested & Reviewed]](https://motherboardtimes.com/wp-content/uploads/2023/05/best-non-conductive-thermal-pastes-768x432.jpg)
